
Building your first gaming PC might look complicated, but it’s much easier than most beginners expect. With the right parts, a clear order, and a little patience, anyone can build a powerful gaming PC without prior experience.
This step-by-step guide is written specifically for beginners. It explains what to buy, what to do first, and how everything fits together, using simple language and real-world advice. By the end of this guide, you’ll understand how to build a gaming PC from scratch and avoid the most common beginner mistakes.
Unlike generic build guides, this tutorial focuses on:
- Clear step-by-step instructions
- Beginner-friendly explanations
- Practical tips that actually matter
- Common mistakes and how to avoid them
You don’t need advanced technical knowledge or expensive tools. If you can follow instructions and take your time, you can build a gaming PC successfully.
What You’ll Learn in This Guide
In this beginner gaming PC build guide, you’ll learn:
- What parts are required to build a gaming PC
- The correct order to assemble each component
- How to safely install the CPU, RAM, GPU, and storage
- How to connect cables properly
- What to check before turning the PC on for the first time
- How to avoid beginner PC building mistakes
This guide is suitable for:
- First-time PC builders
- Gamers switching from console to PC
- Users upgrading from a prebuilt PC
- Anyone who wants full control over their gaming setup
Why Build a Gaming PC Instead of Buying Prebuilt?
Building your own gaming PC offers several advantages over buying a prebuilt system:
- Better value for money: You pay for parts, not brand markup
- Custom performance: Choose parts based on your games and budget
- Easier upgrades: Future upgrades are simpler and cheaper
- Better understanding: You learn how your system works
Prebuilt gaming PCs are convenient, but they often use lower-quality components or limit upgrade options. A custom build gives you full control and long-term flexibility.
Before You Start
Before jumping into the build process, it’s important to:
- Understand the role of each PC component
- Make sure your parts are compatible
- Prepare a clean workspace
In the next section, we’ll go over the tools and workspace setup you’ll need before starting the build.
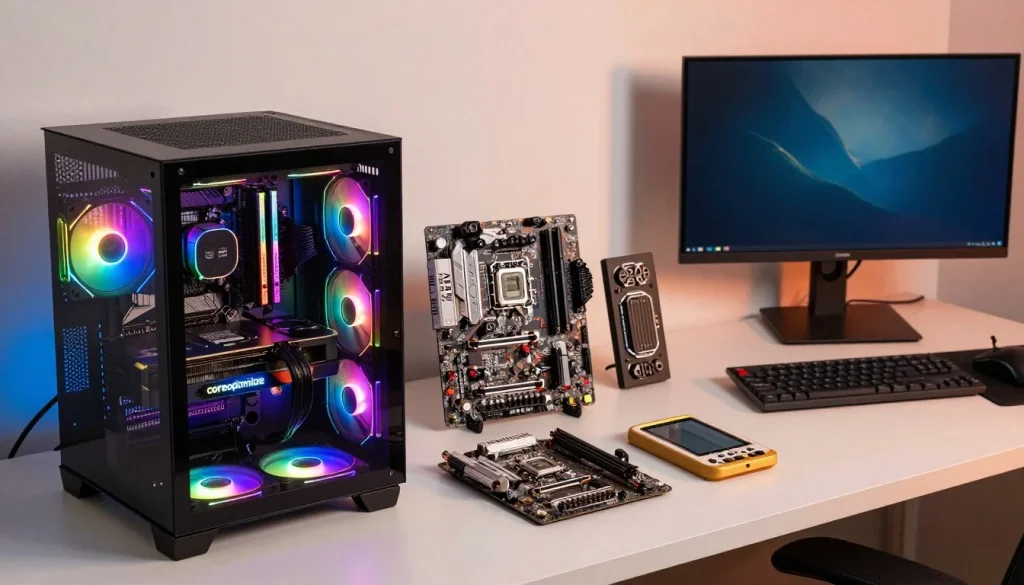
Section 2: Tools & Workspace You’ll Need
Before you start building, let’s set things up properly. A clean workspace and a few basic tools will make the whole process easier, safer, and less stressful.
You don’t need a workshop or expensive equipment. Most beginner PC builds are done on a desk or table at home.
Choose the Right Workspace
Pick a place where you have:
- A flat, sturdy table (not your bed or floor)
- Good lighting so you can see small connectors
- Enough space to lay out all your parts
Avoid building on carpet if possible. Carpet can create static electricity, which isn’t great for PC parts.
A wooden or plastic table works perfectly.
Tools You Actually Need
You only need a few basic tools to build a gaming PC:
- Phillips head screwdriver (medium size)
- Small bowl or cup for screws (so you don’t lose them)
- Clean hands (no food or drinks nearby)
That’s it.
No special tools. No power tools. No experience required.
Do You Need an Anti-Static Wrist Strap?
This is a common beginner question.
An anti-static wrist strap is nice to have, but not required. Many people build PCs without one.
If you want to be extra safe:
- Touch a metal part of your PC case before handling components
- Avoid shuffling your feet on carpet
- Don’t build in very dry environments
Simple precautions are enough for most people.
Unbox Everything Carefully
Before installing anything:
- Open all component boxes one by one
- Keep manuals nearby (especially the motherboard manual)
- Place parts on their boxes or a clean surface
Do not remove protective plastic until you’re ready to install each part.
Check Parts Compatibility (Important Step)
Before you start installing, it’s smart to double-check that all your parts work together:
- CPU matches the motherboard socket
- RAM is supported by the motherboard
- Power supply has enough wattage
- GPU fits inside the case
Skipping this step is one of the most common beginner mistakes.
PC Parts Explained (What Actually Matters in 2026)
When beginners look at PC parts, everything sounds complicated — cores, threads, clocks, watts, chipsets. The truth is, you don’t need to understand everything. You just need to know what actually affects gaming performance today.
Let’s break down each major part in simple terms, with a 2026 mindset.
CPU: The Brain That Feeds Your GPU
The CPU handles game logic, physics, AI behavior, background tasks, and frame consistency.
In 2026:
- High single-core performance matters more than core count for most games
- Modern games rely heavily on CPU–GPU communication
- AI-assisted features add extra CPU load
For beginners:
- You don’t need the most expensive CPU
- A balanced mid-range CPU is often the best choice
- Overspending on CPU while neglecting GPU is a common mistake
What to focus on:
- Modern generation CPU
- Strong single-core performance
- Platform that allows future upgrades
GPU: The Most Important Part for Gaming
The GPU does most of the heavy lifting in games. It handles:
- Graphics rendering
- Ray tracing
- AI upscaling
- Frame generation
In modern gaming:
- GPU choice affects FPS more than any other component
- AI-based features can dramatically boost performance
- More power doesn’t always mean better real-world results
Beginner tip:
- Choose a GPU based on your target resolution (1080p, 1440p, 4K)
- Avoid pairing a high-end GPU with a weak CPU
RAM: Enough Is Better Than Excess
RAM helps your system keep games running smoothly, especially when multitasking.
In 2026:
- Games use more memory than ever
- System stability matters more than raw speed
- Capacity is more important than extreme frequency
What beginners should know:
- Too little RAM causes stutters
- Too much RAM doesn’t increase FPS
- Stable, compatible RAM beats flashy specs
Storage: Why Speed Affects Load Times, Not FPS
Storage controls how fast games load, not how fast they run.
Modern games:
- Are larger than ever
- Stream assets in real time
- Benefit from fast storage
Beginner-friendly advice:
- Use fast storage for your operating system and main games
- Don’t worry about ultra-high speeds
- Reliability matters more than benchmarks
Motherboard: The Foundation of Your Build
The motherboard connects everything together. It affects:
- Upgrade options
- Connectivity
- System stability
In 2026, motherboards matter because:
- New CPUs require new platforms
- Power delivery is more important than ever
- AI and high-speed components need stable support
Beginner mistake:
- Overspending on features you’ll never use
- Underspending and limiting future upgrades
Power Supply: The Most Underrated Component
The power supply keeps everything stable and safe.
In modern PCs:
- Power spikes are common
- GPUs draw more power than before
- Cheap power supplies cause crashes and failures
Beginner rule:
- Never choose a power supply based on price alone
- Extra wattage gives upgrade flexibility
- Stability is more important than efficiency ratings
Cooling: Quiet and Stable Beats Extreme
Cooling keeps your system running smoothly.
For beginners:
- Stock cooling is often enough for mid-range builds
- Air cooling is simpler and safer than liquid cooling
- Good airflow matters more than fancy designs
Overheating leads to:
- Lower performance
- Loud fans
- Shorter component lifespan
Section 4: Choosing the Right Parts for Your Budget
One of the biggest beginner mistakes is trying to build the “best” gaming PC.
There is no single best build — there’s only the best build for your budget and games.
In 2026, smart budgeting matters more than ever because modern parts scale differently depending on how you play.
Start With a Total Budget (And Stick to It)
Before picking any parts, decide:
- How much you want to spend total
- Whether that budget includes peripherals (monitor, keyboard, etc.)
Once your budget is set, don’t let one part eat it all. A balanced system always performs better than an unbalanced one.
Budget Breakdown That Actually Works
A beginner-friendly way to split your budget:
- GPU: ~35–45% of your budget
- CPU: ~20–25%
- Motherboard: ~10–15%
- RAM: ~8–10%
- Storage: ~8–10%
- Power Supply & Case: ~10–15% combined
This isn’t a strict rule, but it’s a proven starting point that avoids common mistakes.
Choose Parts Based on Resolution, Not Hype
Your target resolution should guide your choices.
- 1080p gaming: Strong CPU + mid-range GPU
- 1440p gaming: Balanced CPU + strong GPU
- 4K gaming: GPU-focused build
Buying a high-end GPU for a 1080p monitor often leads to wasted money.
Avoid Overspending on “Invisible” Specs
Some specs sound impressive but offer little benefit to beginners:
- Extremely high RAM speeds
- Overbuilt motherboards with unused features
- Cooling solutions designed for heavy overclocking
Spend where it affects gameplay, not benchmarks.
Think About the Next Upgrade
A smart beginner build leaves room to grow.
Ask yourself:
- Can I upgrade the GPU later?
- Is my power supply strong enough for future parts?
- Will my motherboard support newer CPUs?
Spending a little more now can save you from a full rebuild later.
Use Estimation Tools Before Buying
Instead of guessing:
- Estimate real-world FPS for your games
- Check CPU–GPU balance
- Calculate realistic power needs
- Verify full compatibility
Planning this way prevents wasted money and frustration.
Section 5: Step-by-Step PC Assembly Order (Beginner-Safe)
This is where everything comes together. The key to a smooth first build is following the correct order and not rushing.
You don’t need speed. You need patience.
Below is the safest and easiest order for beginners to assemble a gaming PC.
Step 1: Prepare the Motherboard Outside the Case
Before putting anything inside the case, work with the motherboard on a flat surface (on its box is perfect).
This makes installation easier and reduces stress.
Install these parts first:
- CPU
- CPU cooler
- RAM
- Storage
Doing this outside the case gives you more space and better visibility.
Step 2: Install the CPU Carefully
The CPU is delicate, but not fragile if handled correctly.
Beginner tips:
- Hold the CPU by the edges
- Match the small triangle on the CPU with the one on the motherboard
- Do not force it — it should drop in smoothly
Once seated, secure it according to your motherboard instructions.
Step 3: Install the CPU Cooler
Cooling keeps your CPU performing consistently.
What beginners should know:
- Most coolers come with thermal paste pre-applied
- Tighten screws gradually in a cross pattern
- Plug the cooler fan into the CPU fan header
Avoid overtightening — snug is enough.
Step 4: Install the RAM
RAM installation is easier than it looks.
Tips:
- Use the recommended RAM slots (check motherboard manual)
- Open the clips fully
- Press firmly until both sides click
If it doesn’t click, don’t panic — just reseat it.
Step 5: Install Storage
Fast storage helps with load times and system responsiveness.
For beginners:
- Install primary storage before placing the motherboard in the case
- Secure it properly with the provided screw
- Don’t overtighten small screws
Step 6: Prepare the Case
Now move to the case:
- Install motherboard standoffs if not pre-installed
- Check airflow direction
- Remove unnecessary panels
Good airflow starts with proper preparation.
Step 7: Install the Motherboard Into the Case
Place the motherboard gently into the case:
- Align it with standoffs
- Secure with screws (do not overtighten)
- Ensure all ports line up correctly
This is a good moment to pause and double-check everything so far.
Step 8: Install the Power Supply
The power supply should be installed before connecting cables.
Beginner tips:
- Face the PSU fan toward ventilation
- Secure it firmly
- Do not connect cables yet
Cable management comes later.
Step 9: Install the Graphics Card
The GPU usually goes in last.
Steps:
- Remove the correct PCIe slot covers
- Insert the GPU firmly until it clicks
- Secure it with screws
- Do not forget GPU power cables later
Support larger GPUs properly to avoid sag.
Step 10: Connect Power and Front Panel Cables
This step takes patience.
Take your time with:
- 24-pin motherboard power
- CPU power cable
- GPU power cables
- Front panel connectors (power button, LEDs)
- Case fans
Use the motherboard manual — it’s your best friend here.
First Boot Checklist & Common Beginner Mistakes
Before pressing the power button, take a few minutes to check everything. Most first-time PC issues come from small, easy-to-fix mistakes, not broken parts.
This checklist helps you catch them before they cause stress.
First Boot Checklist (Do This Before Powering On)
Take a deep breath and go through this list:
- CPU cooler fan is connected to the CPU fan header
- RAM sticks are fully seated and clicked in
- GPU is fully inserted and secured
- GPU power cables are connected
- 24-pin and CPU power cables are firmly connected
- Storage is properly installed
- No loose screws inside the case
- Monitor is connected to the GPU (not the motherboard)
If all of this checks out, you’re ready to power on.
What to Expect on First Power-On
The first boot may not look perfect — and that’s normal.
You might notice:
- Fans spinning up and down
- The system restarting once or twice
- A short delay before display appears
This is normal behavior during first initialization.
Common Beginner Mistakes (And How to Avoid Them)
These are the most common issues beginners run into:
- No display: Monitor plugged into motherboard instead of GPU
- PC won’t turn on: CPU power cable not connected
- System shuts down: Cooler not installed correctly
- No boot: RAM not fully seated
- Random crashes: Power supply cables loose
Almost all of these issues are easy fixes.
Modern 2026 First-Boot Tips
Modern systems add a few extra things to check:
- Enable modern memory profiles in BIOS
- Update firmware if required
- Confirm storage is detected properly
- Check fan curves for noise and cooling balance
These steps help your system run smoothly from day one.
Don’t Panic If Something Goes Wrong
Every builder — beginner or expert — has a moment where the PC doesn’t boot on the first try.
That doesn’t mean you failed.
Most issues are solved by:
- Reseating RAM
- Rechecking power connections
- Taking a short break and retrying
BIOS Setup, Drivers & First Optimizations
Your PC is powered on — that’s a big win 🎉
Now it’s time to set things up so your system runs smoothly, safely, and at full potential.
This step is not about tweaking everything. It’s about doing a few important things right.
Step 1: Enter the BIOS (Don’t Be Intimidated)
When you power on your PC for the first time, you’ll need to enter the BIOS.
Usually, this means:
- Pressing Delete or F2 during startup
The BIOS is where your system checks and configures hardware. You don’t need to change much here — just confirm things look right.
Check that:
- CPU is detected
- RAM amount is correct
- Storage is visible
- Fans are spinning and detected
If everything shows up, you’re in good shape.
Step 2: Enable Modern Memory Profiles
By default, RAM does not run at its advertised speed.
One simple setting fixes this:
- Enable the memory performance profile in BIOS
This improves system responsiveness and gaming smoothness without risk.
It’s one of the safest optimizations you can do.
Step 3: Install Your Operating System
Once BIOS looks good:
- Install your operating system
- Choose your primary storage drive
- Complete basic setup
Keep this step simple — advanced tweaks can wait.
Step 4: Install Drivers the Right Way
Drivers help your hardware work properly.
Start with:
- Chipset drivers
- Graphics drivers
- Network and audio drivers if needed
Avoid driver update software that promises “one-click optimization.”
Manual installation from official sources is safer and cleaner.
Step 5: Update What Matters (Not Everything)
In 2026, updates matter — but not all updates are urgent.
Good beginner approach:
- Update graphics drivers
- Install important system updates
- Skip beta or experimental updates
Stability matters more than being first.
Step 6: Basic Performance Checks
Before installing games, do a quick check:
- Make sure temperatures look normal
- Confirm fans aren’t too loud
- Check that storage speeds feel responsive
If the system feels smooth, you’re doing it right.
Performance Expectations, FPS & Smart Optimization
One of the biggest beginner questions is simple:
“How well will my gaming PC actually perform?”
The answer depends on your parts, your games, and how balanced your system is — not just how expensive it looks.
Let’s set realistic expectations and cover a few smart ways to get the most out of your build.
What Affects FPS in Modern Games
In 2026, FPS is influenced by more than just your GPU.
Key factors include:
- CPU and GPU balance
- Game settings and resolution
- Modern upscaling and frame generation
- Background tasks and system optimization
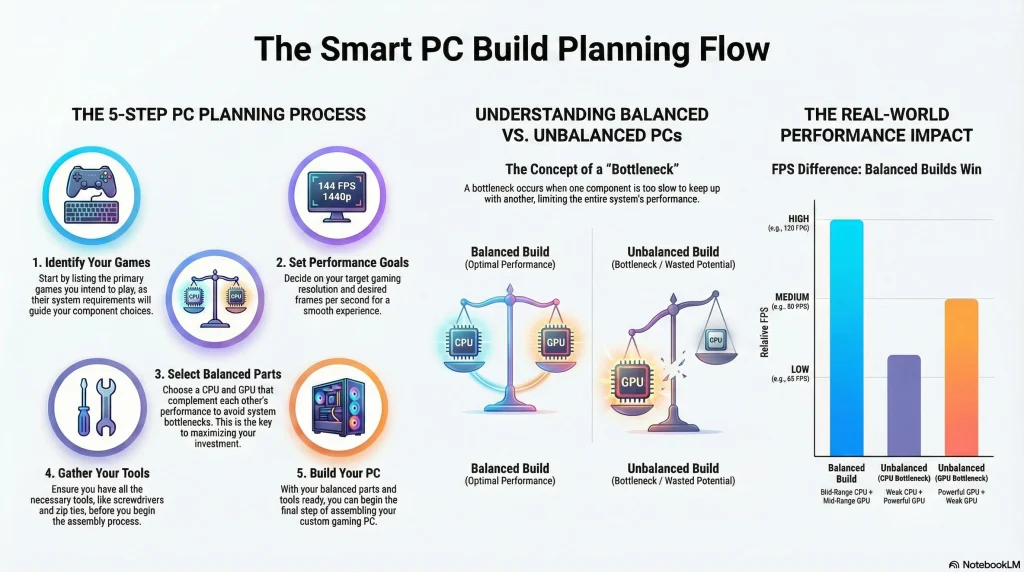
A balanced system often outperforms a more expensive but poorly matched build.
Realistic FPS Expectations (Beginner Friendly)
Instead of chasing exact numbers, think in ranges.
- 1080p gaming: Smooth performance with high settings is achievable on balanced mid-range builds
- 1440p gaming: Strong GPU with a capable CPU delivers great visuals and FPS
- 4K gaming: GPU-heavy builds benefit most from modern performance features
Higher settings don’t always mean better gameplay. Smoothness matters more than maxed-out visuals.
Why Bottlenecks Matter More Than Ever
A bottleneck happens when one part limits the performance of another.
Common beginner examples:
- Strong GPU held back by a weak CPU
- Fast CPU paired with a low-end GPU
- Insufficient power causing performance drops
In modern gaming, bottlenecks affect:
- Frame consistency
- Stuttering
- AI-based performance features
Avoiding bottlenecks leads to smoother gameplay and better long-term performance.
Smart Optimization Tips (Safe for Beginners)
You don’t need extreme tweaks to get good results.
Start with:
- Sensible graphics settings
- Balanced resolution and quality
- Limiting unnecessary background apps
- Keeping drivers up to date
Small adjustments often give better results than aggressive tuning.
Don’t Obsess Over Benchmarks
Benchmarks are useful, but they’re not everything.
Two PCs with similar specs can feel very different in real gameplay. Focus on:
- Smooth frame delivery
- Stable performance
- Quiet and cool operation
If your games feel good, your build is doing its job.
Final Tips, Upgrades & Where to Go Next
If you’ve made it this far, congratulations — you now understand how to build a gaming PC the right way.
Not rushed.
Not outdated.
Not based on hype.
Just smart decisions, step by step.
Final Beginner Tips Before You Game
Before installing all your games, keep these final tips in mind:
- Don’t rush upgrades right away
- Let your system run for a few days and observe
- Keep your drivers and system updated
- Watch temperatures during longer gaming sessions
A stable PC is better than a constantly tweaked one.
When Should You Upgrade?
You don’t need to upgrade often.
Good reasons to upgrade:
- New games don’t hit your target FPS
- Your GPU can’t handle your preferred resolution
- Your CPU struggles in modern titles
- You want better efficiency or lower noise
Upgrading only when needed saves money and keeps your system balanced.
Upgrade in the Right Order
For most gaming PCs, the smartest upgrade path is:
- Graphics card
- CPU (if needed)
- Storage
- RAM
Upgrading randomly often leads to new bottlenecks.
Use Tools to Make Smarter Decisions
Modern PC building doesn’t rely on guessing.
Before upgrading or rebuilding, it helps to:
- Check CPU–GPU balance
- Estimate real-world FPS
- Calculate safe power requirements
- Verify compatibility
These steps help you avoid expensive mistakes and unnecessary upgrades.
Building PCs Is a Skill You Keep Forever
Your first build is the hardest.
After that:
- Upgrades feel easier
- Troubleshooting makes sense
- You understand what matters and what doesn’t
PC building becomes a hobby, not a challenge.
What to Do Next
From here, you can:
- Install your favorite games
- Fine-tune your settings
- Plan future upgrades with confidence
And most importantly — enjoy the PC you built yourself.
Frequently Asked Questions
Is building a gaming PC hard for beginners?
No. Building a gaming PC is easier than most beginners expect. With step-by-step guidance and patience, anyone can do it.
How long does it take to build a gaming PC?
Most beginners finish their first build in 2 to 4 hours, including setup and checks.
What is the most important part of a gaming PC?
The graphics card (GPU) has the biggest impact on gaming performance, followed by the CPU.
Do I need expensive parts to build a good gaming PC?
No. Balanced mid-range components often deliver better real-world performance than unbalanced high-end builds.
How do I know if my PC parts are compatible?
You should always verify compatibility between the CPU, motherboard, RAM, GPU, and power supply before purchasing.
What causes bottlenecks in gaming PCs?
Bottlenecks occur when one component limits another, such as a weak CPU holding back a powerful GPU.
Can I upgrade my gaming PC later?
Yes. Gaming PCs are designed for upgrades, especially graphics cards, storage, and memory.